

Imagine sitting down to play your favorite melody, only to find the notes sound sour and hollow. Many musicians feel the urge to grab a wrench and fix the issue immediately. But, tuning your own piano. is often more challenging than expected.
At Vesta Piano, we see instruments damaged by well-meaning owners who underestimated the task. Saving money is appealing, but the process needs immense patience and focus.
This beginner piano tuning guide helps you understand the reality of professional maintenance. We explore whether you should really tune a piano by yourself or call an expert. Before you start, consider if is it easy to tune a piano by yourself without risking permanent damage to your instrument. Our goal is to provide the clarity you need to make an informed decision.
Key Takeaways
- Professional maintenance prevents costly long-term damage to your instrument.
- DIY adjustments require specialized tools and significant technical patience.
- Vesta Piano experts emphasize that precision is vital for sound quality.
- Minor errors during the process can lead to broken strings or pinblock issues.
- Understanding the scope of work helps you decide between DIY or professional help.
Is it easy to tune a piano by yourself?
Is tuning a piano by yourself really easy, or is it a costly mistake? The idea of self-taught piano tuning might seem good to save money. But, the reality is much harder than most think. Many start with simple piano tuning tips, only to find it’s much more complex.

Understanding the complexity of piano mechanics
A piano is not just a simple musical device; it’s a complex machine with over 200 high-tension strings. Each string puts a lot of pressure on the frame. Changing one note can affect the tension of others.
When you try diy piano tuning, you’re not just adjusting one note. You’re balancing forces across the entire soundboard. This requires deep knowledge of how the parts work together.
You need to know how the pin block holds the tuning pins and how the bridge transfers vibrations. Without this knowledge, even careful attempts at tuning my own piano can lead to poor sound quality.
The risks of DIY tuning for your instrument
The dangers of self-tuning a piano are more than just a bad note. Too much torque can crack the pin block, a costly fix. Beginners often snap strings, which is hard to fix without the right tools and skills.
Piano tuning for beginners is often underestimated, leading to damage that can lower your piano’s value. If you’re not careful, saving money can end up costing more than a professional service. It’s important to think about these risks before trying to tune a piano by yourself.
If DIY tuning seems too hard or your piano’s pitch isn’t stable, it’s time to get help. A professional from www.vestapiano.ca has the training to handle high-tension strings safely. They can spot issues that a beginner might miss.
Here’s a comparison to help you decide between DIY and a professional:
| Feature | DIY Tuning | Professional Service |
|---|---|---|
| Skill Level | Novice/Beginner | Certified Technician |
| Risk of Damage | High | Negligible |
| Pitch Stability | Short-term | Long-term |
| Cost Efficiency | Low (due to potential repairs) | High (value for money) |
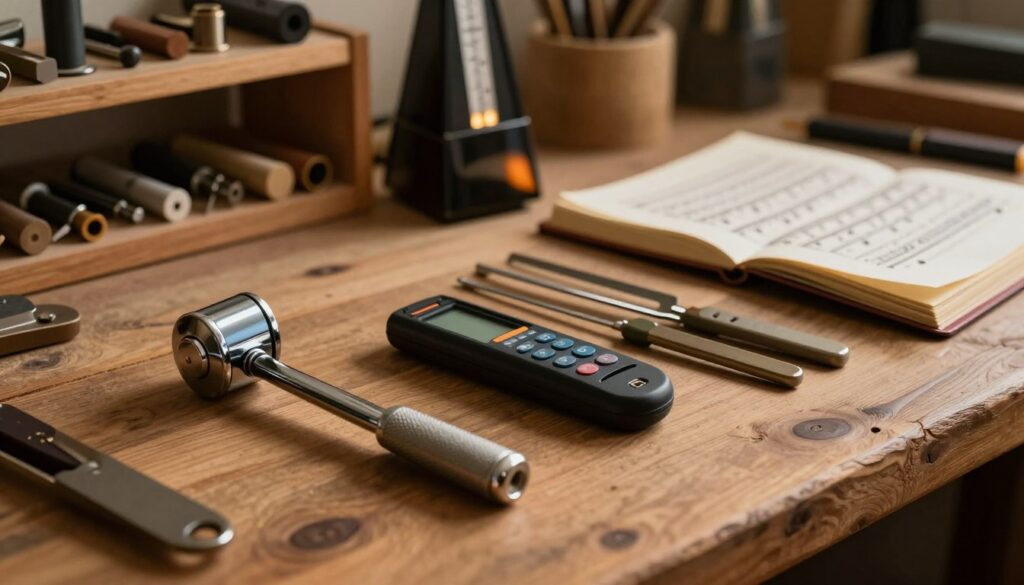
Essential tools for piano tuning at home
Starting with the right tools is key to keeping your piano in top shape. The quality of your tools greatly affects your tuning results. Here are some piano tuning tips to help you avoid common mistakes.
Selecting the right tuning lever and mutes
Choosing a good tuning lever is crucial when tuning your piano at home. Avoid cheap levers as they can slip and cause damage. Instead, invest in a professional-grade lever. You can find reliable ones for around $50, perfect for beginners.
You’ll also need mutes to silence other strings. These piano tuning tools help you focus on the string you’re tuning. Without them, you’ll find it hard to hear the correct pitch.
Choosing reliable electronic tuning software
Today, tuning your piano at home is easier thanks to technology. But, picking the right software is important. Standard chromatic tuners may not work well because they don’t account for “stretched tuning.”
Apps like PianoMeter are great for piano tuning at home. They help calculate your piano’s unique sound profile. This ensures your piano sounds balanced and clear across all octaves.
Setting up your workspace for optimal results
Before you start tuning your own piano, set up your workspace. A messy or dimly lit area makes it hard to see the pin block. Make sure you have a bright light to inspect the piano’s interior.
Clear the area around your piano for easy movement. You need enough space to work comfortably. A well-organized workspace is essential for a successful tuning session.
Preparing your piano for the tuning process
To learn how to tune a piano at home, you need to safely take it apart. This step is crucial for a clear view of the piano’s parts before you start tuning.
Removing the cabinet panels safely
For grand pianos, just open the lid and take off the music desk. This lets you see the strings and pins. Upright pianos need more care. You must lift the top lid and remove the front panel to see the action.
Be slow and careful to avoid scratches or damage. Taking your time helps prevent accidents and costly fixes.
Identifying the strings and pin block layout
After opening up the piano, find the right strings and pins. The pin block is a key part where the tuning pins are fixed. It’s important to pick the correct string for the note you want to tune.
When tuning a piano at home, the string layout can be confusing. Use your piano tuning tools to check a pin before you start tuning.
Cleaning the interior before you begin
Before tuning, clean the inside of the piano. Dust can harm the mechanical parts and affect the sound.
Use a soft rag or a gentle duster to clean the soundboard and pin area. A clean workspace helps keep your tuning process accurate and free from problems.
Executing the tuning process step by step
The journey to a perfectly tuned piano starts with a solid foundation in the middle register. This beginner piano tuning guide suggests beginning at the bottom of the tenor break. Proper piano tuning techniques are key to keeping your instrument in good shape.
Setting the temperament octave
Your first task is to set the temperament octave. This is your reference point for the rest of the piano. When self-tuning a piano, make sure this section is spot on. Use your electronic software to get the pitch right for each note in this central range.
Tuning the remaining octaves using the temperament
After setting the temperament, you can tune the rest of the keyboard. Learning to tune a piano means using your reference notes to tune above and below the center. Listen for clear harmonies as you tune to ensure the piano sounds balanced.
Managing unisons for a clean sound
Most piano notes have two or three strings that must vibrate in perfect harmony. In self-taught piano tuning, a “wah-wah” sound means the strings are off. Adjust the side strings until this sound goes away, leaving a pure tone.
Handling the challenges of high-tension strings
High-tension strings need extra care because they can snap if adjusted too fast. When doing these diy piano tuning steps, use slow, controlled movements with your tuning lever. This careful method is crucial for a successful piano tune-up tutorial, as it prevents sudden pitch drops and protects the instrument.
- Always move the lever in small, incremental turns.
- Listen closely for the disappearance of the beating sound.
- Check your work frequently against your electronic reference.
- Keep your posture steady to maintain consistent pressure.
Common mistakes to avoid during self-guided tuning
Knowing the common mistakes in self-guided piano tuning is key to keeping your piano in good shape. While it can be fulfilling, small mistakes can cause big problems that need a pro’s help.
Over-tightening pins and risking structural damage
One big mistake is using too much force on the tuning pins. When you try amateur piano tuning, it’s easy to tighten too much. This can damage the pin block or even break the pin.
Also, beginners often break strings because they put the tuning lever on the wrong pin. Always make sure you’re working on the right string before tightening.
Failing to account for string tension balance
A piano is a high-tension machine that needs balance. When you do diy piano tuning, adjusting one string can upset the whole balance.
Ignoring this balance can warp the soundboard or harm the piano’s structure. Good piano tuning techniques look at the whole instrument, not just one note.
Ignoring the importance of pitch stability
Many beginners see their hard work undone in days because they don’t set the pins right. If you’re tuning a piano by ear, make sure the pin is set correctly to keep the tension steady.
Not paying attention to pitch stability is a common mistake. Without proper setting, the string will return to its original position. This makes your piano sound out of tune right after you finish tuning.
Conclusion
Getting a stable and clear sound needs both skill and patience. This guide helps you understand your piano better.
Trying piano tuning yourself gives you a new view on music. You learn to appreciate the skill in every note.
Self-tuning is hard but rewarding. It’s important to think about your piano’s safety while you learn.
If tuning is too hard, don’t worry. Vesta Piano can help you with professional tuning.
Keeping your piano in good shape is key. Whether you tune it yourself or get help, your piano will sound great for years.
FAQ
Is it easy to tune a piano by yourself if I use an app?
While using an app like PianoMeter makes the process more accessible, it does not replace the physical skill required to manipulate the tuning lever. Self-tuning a piano still requires a delicate touch to avoid breaking strings or damaging the wood, even with digital assistance.
What are the most important piano tuning tips for beginners?
The best piano tuning tips include using a high-quality tuning lever, moving the pins in very small increments, and always performing a “test blow” on the key to ensure pitch stability. Also, never turn a pin unless you are 100% sure which string it is connected to.
How long does learning to tune a piano typically take?
Learning to tune a piano to a professional standard can take years of practice. But, a dedicated beginner can learn the basics of how to tune a piano at home over several months with the right piano tuning guide and consistent practice on a “beater” piano.
Can I perform a piano tune-up tutorial without professional tools?
It is highly discouraged. Using improper piano tuning tools, such as a standard socket wrench, will strip the tuning pins and ruin the piano. To succeed at tuning your own piano, you must invest in a proper lever and specialized mutes.
Is tuning a piano by ear better than using software?
Tuning a piano by ear is a traditional skill that allows for great artistry, but it is extremely difficult for beginners. Most modern DIYers find that a combination of self-guided piano tuning software and ear-checking for unisons provides the best results for piano tuning at home.
What should I do if a string breaks during diy piano tuning?
If a string snaps during your beginner piano tuning guide practice, you should stop immediately. Replacing a string requires specialized wire and tools. This is the ideal time to contact a professional from www.vestapiano.ca to repair the damage and finish the tuning safely.
Are there specific piano tuning techniques to keep the piano in tune longer?
Yes, “setting the pin” is the most critical of all piano tuning techniques. This involves slightly overshooting the pitch and then bringing it down to the target while applying a firm strike to the key, ensuring the string tension is balanced across all contact points.